How to Create a Simple Robot for Beginners in Easy Steps
Creating a simple robot can be a thrilling venture, especially for beginners looking to dive into the world of robotics. As technology continues to evolve, more aspiring engineers are seeking ways to harness their creativity and technical skills through hands-on projects. Renowned robotics expert Dr. John Smith once stated, "To create a robot is not just about coding; it's about teaching machines to understand and interact with the world around them." This mindset opens up a wealth of opportunities for those starting their journey in robotics.
The process of creating a robot can be broken down into manageable steps, allowing beginners to gradually build their knowledge and confidence. From assembling components to programming behavior, each phase serves as a building block that cultivates a deeper understanding of robotic systems. By following a straightforward guide, newcomers can embark on an exciting adventure that sparks their passion for innovation and problem-solving.
Ultimately, the ability to create a robot is within reach for anyone willing to learn. As you follow the steps outlined in this guide, remember that every expert was once a beginner. Embrace the challenges and triumphs that come your way, and soon you'll discover the joy of turning your ideas into reality through robotics.
Understanding Basic Robotics Concepts for Beginners
Understanding basic robotics concepts is essential for beginners who wish to dive into the world of building simple robots. At its core, robotics combines various fields such as engineering, computer science, and electronics. To start, one must grasp the fundamental components that make up a robot, including sensors, actuators, and controllers. Sensors act as the robot's eyes and ears, allowing it to perceive its environment by collecting data. Actuators, on the other hand, are the muscles of the robot, enabling it to move and perform actions based on the data received from sensors.
Another vital concept is programming, which dictates how a robot interprets sensor data and makes decisions. Beginners can start with simple programming languages and environments designed for newcomers, which offer user-friendly interfaces and built-in libraries. Understanding these basic principles, such as input-output relationships and control systems, will empower beginners to tackle simple robotic projects confidently. Exploring these concepts will not only enhance one’s problem-solving skills but also provide the foundational knowledge necessary for more advanced robotics in the future.
How to Create a Simple Robot for Beginners in Easy Steps
| Component |
Function |
Recommended Type |
Estimated Cost (USD) |
| Microcontroller |
Controls the Robot |
Arduino UNO |
$25 |
| Motors |
Provides Movement |
DC Motors |
$15 |
| Chassis |
Holds All Components |
Plastic Chassis Frame |
$10 |
| Sensors |
Detect Environment |
Ultrasonic Sensor |
$5 |
| Power Supply |
Provides Energy |
Rechargeable Battery |
$20 |
Selecting the Right Materials and Tools for Your Simple Robot
When embarking on the journey of building a simple robot, one of the first and most crucial steps is selecting the right materials and tools. According to the International Federation of Robotics, the global robotics market is expected to continue growing at a rate of 25% annually, indicating the rising interest in robotics among enthusiasts and beginners alike. To kickstart your project, you'll need basic components such as microcontrollers, sensors, and actuators. A popular choice for beginners is the Arduino platform, known for its user-friendly environment and extensive community support.
In terms of tools, having a reliable set of hand tools is essential. A soldering iron, wire cutters, and a multimeter are invaluable for assembling and testing your robot. Additionally, a breadboard allows for quick prototyping without the need for soldering. These basics not only streamline the assembly process but also help in troubleshooting as you develop your skills.
Tip: Always consider the weight and size of your components, as these factors will affect your robot's mobility and functionality. A well-balanced setup is key to smooth operation.
Tip: Look for quality materials but keep in mind your budget. Interestingly, surveys show that almost 60% of robotics hobbyists start with DIY kits, which can be cost-effective and provide a solid foundation for hands-on learning.
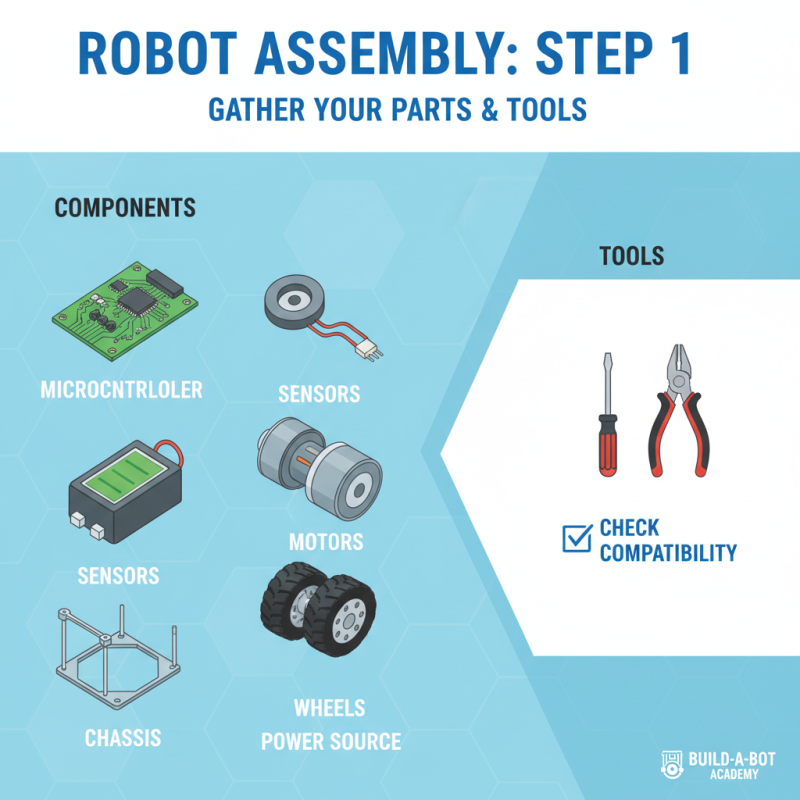
Step-by-Step Guide to Assembling Your Robot Parts
Assembling your robot can be an exciting and educational experience, especially for beginners. The first step in this process involves gathering all the necessary parts. You will typically need a microcontroller, sensors, motors, wheels, a power source, and a chassis. These components serve as the building blocks of your robot, each playing a crucial role in its functionality. It's important to check that all parts are compatible with each other and that you have the appropriate tools, such as a screwdriver and wire cutters, ready for assembly.
Once you have your parts, it's time to start putting everything together. Begin with the chassis, which will serve as the frame for your robot. Attach the motors to the chassis, followed by the wheels, ensuring they are securely fastened. Next, mount the microcontroller and connect the various sensors according to the wiring diagram. This step requires careful attention to detail to avoid any confusion during programming later on. After assembling the mechanical components, make sure to connect the power source properly, as it will provide the necessary energy for your robot to operate. With these steps completed, you will have a basic robot ready for programming and testing.
Programming Your Robot: Introduction to Basic Coding
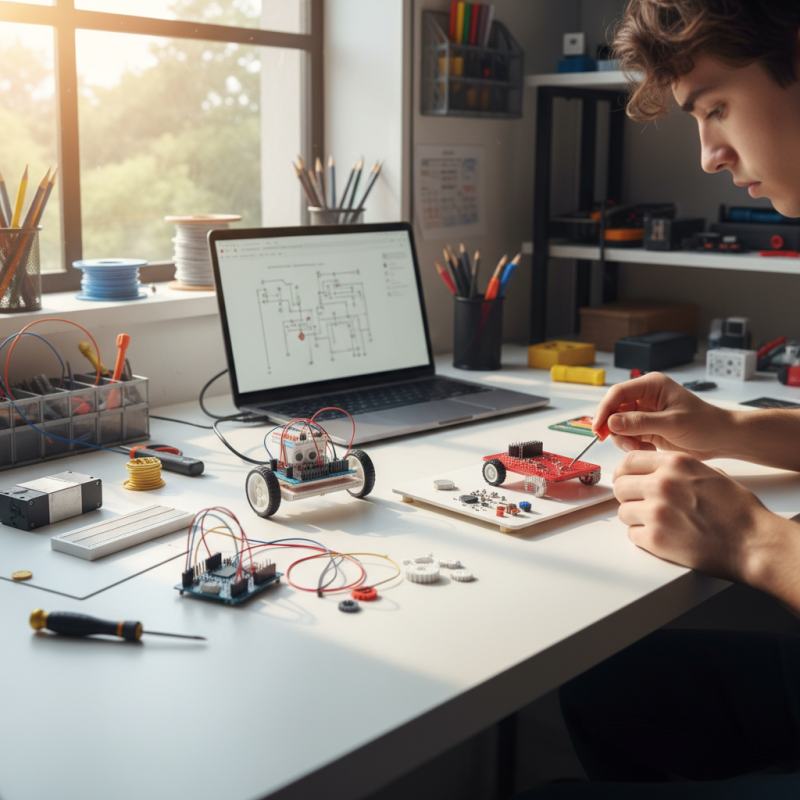
Programming your robot can seem daunting at first, but with a few basic coding concepts, you’ll be well on your way to creating a fun and functional robot. Start by familiarizing yourself with some foundational programming languages, such as Python or Arduino language, which are commonly used in robotics projects. These languages allow you to write simple commands that can control your robot’s movements and actions.
Tips: Begin with small coding tasks to build your confidence. For instance, start by programming LED lights or simple sensors to respond to specific stimuli. This will help you understand how your code translates into physical actions, making it easier to progress to more complex functions.
As you get comfortable with basic commands, experiment with loops and conditionals, which are essential for making your robot react to different scenarios. By setting conditions (if-then statements), your robot can perform different actions based on environmental inputs.
Tips: Always test your code frequently to catch errors early. Use print statements to debug and understand the flow of your program. This practice will make troubleshooting much more manageable as you develop your robot.
Daily Steps Count for a Week
This chart represents the number of steps taken over a week, showcasing the daily activity levels.
Testing and Troubleshooting Your Simple Robot Design
Once you have built your simple robot, the next step is to test and troubleshoot its design to ensure it operates as intended. Begin by conducting basic functionality tests.
Check each component individually, such as sensors, motors, and power supply. This approach will help you pinpoint any issues related to wiring or compatibility before performing a full-scale test of the entire robot.
Tips: When testing, use a checklist to document each component's status. This will help you track any problems more effectively and ensure that nothing is overlooked.
While troubleshooting, keep an eye out for common issues such as loose connections or improperly configured programming. If your robot isn’t responding correctly, double-check your code for errors or miscalculations, and make sure that your power source is providing the necessary voltage. It can be helpful to use debugging tools or simulations to visualize how your robot should behave under different scenarios.
Tips: Don’t hesitate to involve friends or fellow hobbyists in the troubleshooting process. A fresh pair of eyes can often spot issues that you might have missed and provide new insights into solving complex problems.